Uploading Field-of-View Images
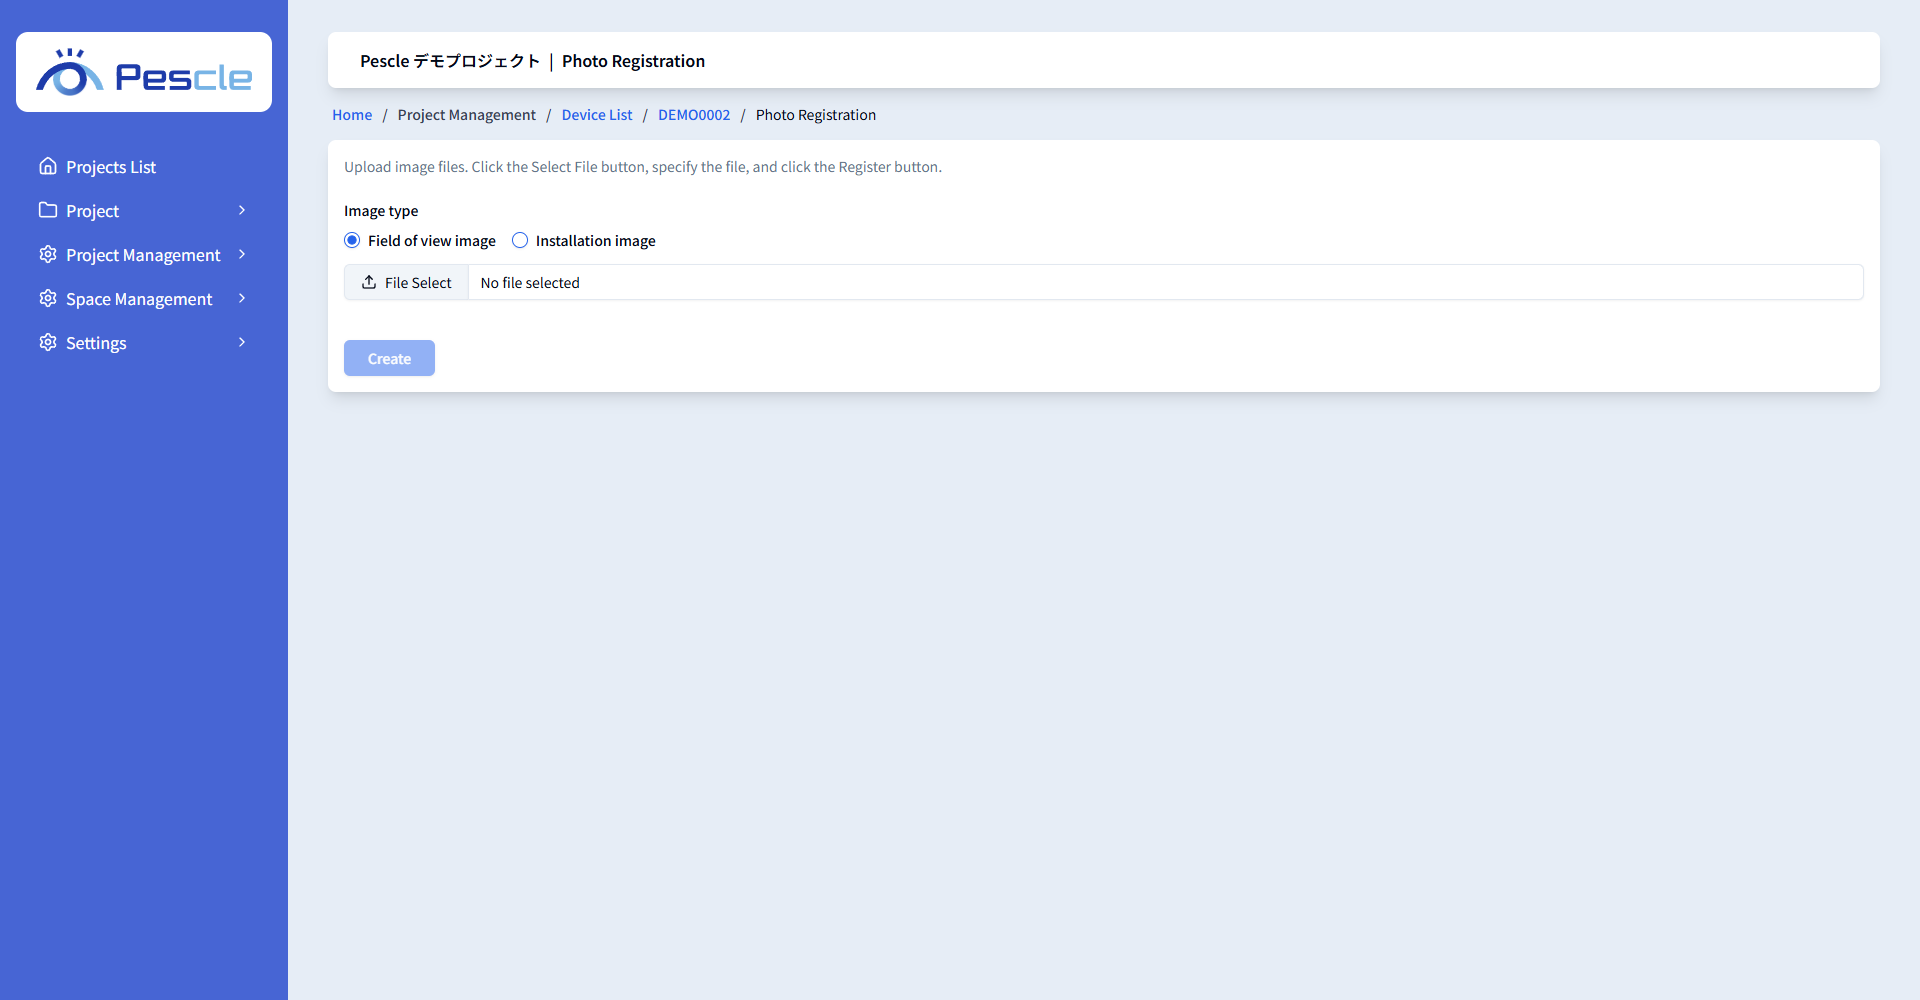
For each device, you can register a “field of view image” showing the camera’s field of view and an “installation image” showing how the device is installed. Registering these images makes it easier to check the installation status on the device detail screen.
The “latest image” is updated automatically from the footage received from the camera, so you do not need to upload it.
Upload Steps
1. Open the detail of the target device from [Device List] under [Project Management] and click the [Photo] button.
2. On the photo registration screen, select the image type ([Field of view image] or [Installation image]).
3. Click the [Image file] button and select a file. JPG, JPEG, and PNG formats are supported.
4. Click the [Register] button. When “Image uploaded successfully” is displayed, you are done.
Rotating and Deleting Images
Uploaded images can be viewed under “Device Images” on the device detail screen. Use the rotate button on each image to change its orientation, and the delete button to delete the image.